Recommended Mods
For players who are seeking a more enhanced experience, below are the Staff's official recommendations for mods. These mods have been carefully selected for the optimum game experience on Ravenkraft without significantly breaking the semi-vanilla experience.
The easiest way to get started is to simply download the mods for the current version Ravenkraft is running on and drag them into the appropriate folder inside your Mineraft folder (on Windows, it is located at %appdata%/.minecraft). Start with the Base Requirements (preferrably on a clean Minecraft install) before downloading any other mods.
Please reach out to the staff if you have questions or encounter any issues.
Base Requirements
Java
This is not a mod. Ensuring your Java Client is up to date will reduce the possibility of issues with these mods.
Installation: Run the installer.
Fabric Launcher + Fabric API
Fabric is a modular, lightweight mod loader for Minecraft.
Fabric API is the core library for mods using the Fabric toolchain.
Both are required for most mods on this page to work.
Installation: Run Fabric Launcher installer. Drag Fabric API into the /mods folder.
Performance Improvements
Visual Improvements
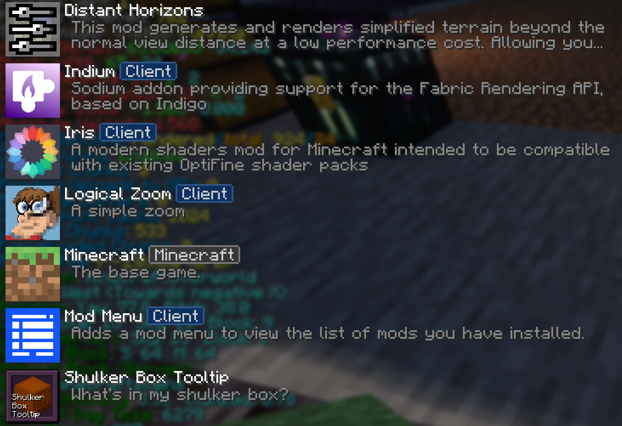
Distant Horizons
Distant Horizons adds simplified terrain past Minecraft's default view distance to improve performance and allow for longer draw distances.
Installation: Drag into the /mods folder.
Requires: Fabric Launcher, Fabric API, Sodium
Fresh Animations + EMF + ETF + Entity Culling
Fresh Animations is a resource pack that gives an animation overhaul to the creatures in the default look of Minecraft to make the mobs more dynamic and believable.
Entity Model Features (EMF) is a mod that adds support for Custom Entity Models (CEM). It is required for Fresh Animations to work.
Entity Texture Features (ETF) is a mod that adds many new Entity Texture Features, including entity and player skin features. It is required for Fresh Animations to work.
Entity Culling uses async path-tracing to skip rendering Block/Entities that are not visible to improve performance. It is recommmended for Fresh Animations to work efficiently.
Installation: Drag Fresh Animations into /resourcepacks folder. Drag EMF, ETF and Entity Culling into the /mods folder.
Requires: Fabric Launcher, Fabric API, Sodium
Shaders
Complementary Shaders
Complementary Shaders is a shader pack with exceptional attention to detail, high standards of quality, and top tier optimisation.
Installation: Drag into the /shaders folder.
Requires: Fabric Launcher, Fabric API, Sodium, Iris
QOL Improvements
Mod Menu
Mod Menu adds a menu screen for viewing a list of installed mods.
Installation: Drag into the /mods folder.
Requires: Fabric Launcher, Fabric API
Xaero's Minimap
Xaero’s Minimap is a minimap mod with customizable settings, entity display, waypoints, and cave mode.
Installation: Drag into the /mods folder.
Requires: Fabric Launcher, Fabric API
Xaero's World Map
Adds a full screen world map which shows you what you have explored in the world. Works great together with Xaero's Minimap.
Installation: Drag into the /mods folder.
Requires: Fabric Launcher, Fabric API
Shulker Box Tooltip
Shulker Box Tooltip allows you to see a preview window of a shulker box contents when hovering above it in an inventory.
Installation: Drag into the /mods folder.
Requires: Fabric Launcher, Fabric API
Logical Zoom
Logical Zoom is a simple mod that adds a configurable zoom key (as with Optifine).
Installation: Drag into the /mods folder.
Requires: Fabric Launcher, Fabric API
Lighty
Lighty renders a transparent carpet-like block on top of blocks to see whether they are spawning mobs or not.
Installation: Drag into the /mods folder.
Requires: Fabric Launcher, Fabric API
BetterF3
BetterF3 is a mod that replaces Minecraft's original debug HUD with a highly customizable, more human-readable HUD.
Installation: Drag into the /mods folder.
Requires: Fabric Launcher, Fabric API
Nether Guide
On Ravenkraft, the Nether is a public space where predictable, safe, and easy-to-use navigation is prioritized above other uses. Construction of official pathways and portals in the nether is governed by RvDOT guidelines. Reach out to the staff if you have questions.
RvDOT Pathway Guidelines
- Express tunnels are positioned at every cardinal direction from 0,0.
- Secondary avenues intersect each Express tunnel at multiples of 500. They are prioritized as they are needed.
- All express tunnels, avenues and official pathways start with a blast-resistant 3-wide subfloor at level 63 with 1 block on each side at level 64 as railings. This establishes the minimum requirement for each pathway. When feasible, blast-resistant slabs and Blue Ice are added on top. Lastly, buttons are placed on top of the ice for mob-proofing.
- Once Blue Ice has been placed, you may add a stop by placing a 7-long stretch of Froglights or similar light source to one side of the tunnel. The side that gets the stop is the right-hand side when facing towards spawn. Use other stops in the same tunnel for reference or ask a staff member.
- Use the F3 Hud to ensure that your Targeted Block is correctly positioned.
- When starting a new pathway, begin with a 1-wide tunnel/bridge.
- When tunneling through thick netherrack, the subfloor is not a priority. You may conserve resources if necessary.
- Regulation portals are 5x5 in size (not the typical 4x5). RvDOT recommends setting your portals at level 65 so they can be easily connected to the closest pathway.
- Players may build portals and tunnels as they like, provided they do not interfere with official pathways. In very rare instances, you may be asked to shift your portal or pathway slightly.
Nether Calculator
Easily convert your Overworld portal coordinates to their RvDOT-approved equivalent in Nether.
Overworld Coordinates
Input your Overworld portal coordinates.
Nether Coordinates
RvDOT recommends you manually place a 5x5 (3x3 opening) portal at these exact coordinates.
-
65
-
Your recommended coordinates are calculated by dividing your overworld coordinates by 8, then rounding to the nearest multiple of 5 that does not invade the right-of-way.
It is calculated in this manner to guarantee that your portal is in the best possible location for easy connectivity to official pathways. In the vast majority of cases, this minor adjustment should not affect the functionality of your portal.
If you encounter issues, reach out to the staff. If you need more specific tools, try MaximumFX's Calculator.
The exact coordinate conversion results are:
-
-
-
Dynmap Guide
On Ravenkraft, the Dynmap is carefully handled by the staff. It is regularly updated to reflect new settlements, notable builds, event locations, and public farms, among other things. If your primary settlement has not yet been marked or if you feel that your build deserves a marker, reach out to the staff. In some cases, marker requests may be denied for purposes of consistency.
Marker Generator
Easily produce code to add a map marker to the Dynmap. Only an Admin can approve a marker and execute commands. Please request help from the staff.
Marker Attributes
Input data about your marker. The Type will determine the proper Icon and Set automatically. For Event Locations, end with (Event Title - Month Year).
Marker Command Output
Staff members can copy this command into the console or in-game chat to add this Marker to the Dynmap.